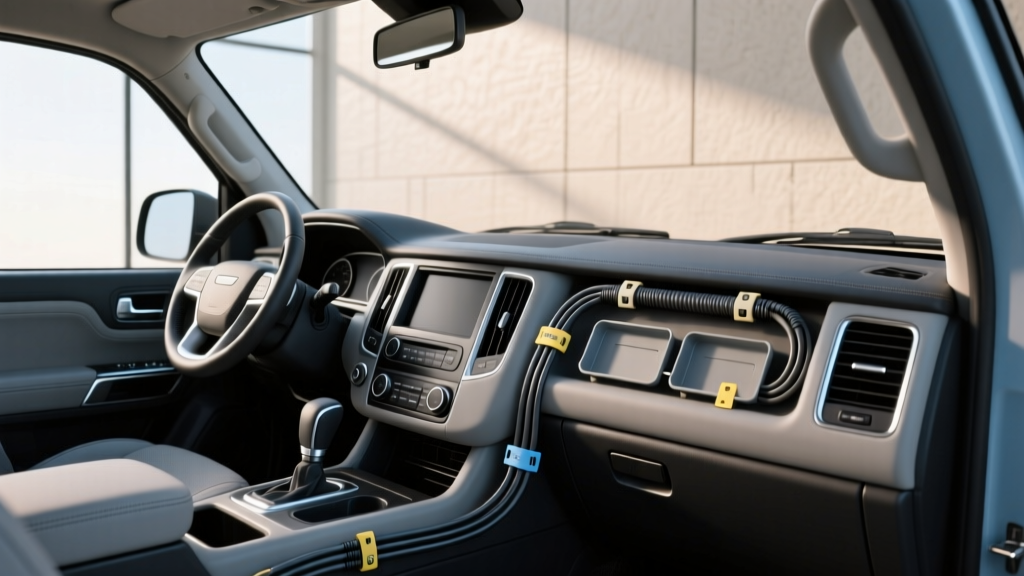
Commercial Vehicle Wire Tidy Installation (2026)
Commercial vehicles live hard lives. Between long shifts, constant door cycles, frequent cleaning, and add-on equipment installs, cabin wiring can quickly turn into a tangled, noisy mess. Loose cables snag boots, catch on seat rails, interfere with pedals, and make every future accessory upgrade harder than it needs to be. A proper wire tidy setup fixes all of that?cleanly routing, securing, and protecting wires so the interior stays safe, quiet, and professional-looking.
Whether you drive a work van, pickup, box truck, shuttle, or fleet vehicle, you?ve likely added something aftermarket: a dash cam, radio, GPS tracker, inverter, LED strobes, CB, tablet mount, or extra USB outlets. Each add-on brings more wiring. A wire tidy installation isn?t just about aesthetics; it?s about reducing wear, preventing intermittent faults, and keeping critical controls and airbags unobstructed.
This guide walks you through choosing the right wire management products, planning your routes, and installing a commercial-grade wire tidy system that holds up to daily use. You?ll get practical tips, product comparisons, common mistakes to avoid, and a simple checklist you can follow on your next install.
What ?Wire Tidy? Means in a Commercial Vehicle
A ?wire tidy? is the combination of methods and materials used to organize and secure wiring inside the cabin (and sometimes behind the dash). The goal is to keep wires:
- Safe: away from pedals, steering column, seat tracks, airbags, and sharp edges
- Protected: insulated from abrasion, heat, and pinch points
- Serviceable: easy to trace and remove later without cutting everything apart
- Quiet: reducing rattles and buzzes caused by loose harnesses
- Professional: clean routing that looks factory or fleet-grade
Tools and Materials You?ll Want on Hand
Essential tools
- Trim removal tools (plastic pry tools)
- Wire cutters and flush cutters (for zip tie tails)
- Crimp tool + assorted terminals (ring, spade, butt connectors)
- Multimeter (for verifying power/ground)
- Torx/Phillips drivers and small socket set
- Flashlight or headlamp
Wire management materials (the ?wire tidy kit?)
- Fabric harness tape (anti-rattle, OEM-style)
- Split loom tubing (abrasion protection)
- Heat shrink tubing (insulation and strain relief)
- Zip ties (standard + high-temp if needed)
- Mounting bases (adhesive and/or screw-in zip tie anchors)
- Cable clips (P-clips, edge clips, or stick-on clips)
- Grommets (for any wire passing through metal/plastic panels)
- Label tags (wrap labels or heat-shrink labels)
Product Recommendations: What Works Best in Work Vehicles
Commercial interiors see vibration, temperature swings, and frequent cleaning. That means cheap adhesive and brittle plastic often fails. Here?s how the most common wire tidy products compare.
1) Fabric harness tape vs. electrical tape
- Fabric harness tape (recommended): reduces squeaks/rattles, stays put in heat, looks OEM. Great for bundling wires behind trim and around pillars.
- Electrical tape: can get gummy over time, collects dust, and unwraps in heat. Use only as a temporary wrap or for minor insulation?then cover with heat shrink or loom.
2) Split loom vs. braided sleeve
- Split loom (recommended for most installs): quick to apply, good abrasion protection, easy to service.
- Braided sleeve: cleaner look and flexible, but can fray if cut poorly; best for visible runs (like under-seat accessory wiring) and when you can heat-shrink the ends.
3) Zip ties vs. hook-and-loop (Velcro) straps
- Zip ties: strong, cheap, great for permanent routing. Use flush cutters to avoid sharp tails.
- Hook-and-loop straps (recommended for serviceable areas): ideal for under-seat bundles, fuse block access, and areas you?ll revisit.
4) Adhesive mounts vs. screw-in mounts
- Adhesive mounts: quick, but can fail on textured plastic, dusty panels, or in heat. Best used only after proper surface prep.
- Screw-in mounts (best for fleets): strongest and most reliable. Use where you can safely drill without hitting wiring, airbags, or the other side of a panel.
Plan Before You Install: Routing Rules That Prevent Problems
A clean commercial vehicle wire tidy starts with a plan. Spend five minutes thinking about routing and you?ll save an hour of rework.
Follow these routing rules
- Avoid airbag zones: A-pillars, steering wheel area, dash top, and curtain airbag paths. If your vehicle has A-pillar airbags, never zip-tie wiring to airbag brackets or place wiring over deployment paths.
- Keep clear of moving parts: pedals, steering column joints, parking brake mechanisms, seat tracks, and door hinges.
- Use factory paths: whenever possible, follow existing harness channels and clips.
- Protect pass-through points: any hole, metal edge, or sharp bracket needs a grommet or edge guard.
- Leave service slack: a small loop near devices and connectors so you can pull a head unit or dash panel without yanking wiring.
Real-world example: Dash cam + GPS tracker in a work van
A common setup is a dash cam powered from an ignition source and a GPS tracker hardwired to constant power. The tidy approach:
- Run both cables up the headliner edge, then down the A-pillar behind the trim but away from airbag deployment paths.
- Bundle both runs in fabric tape to prevent rattles.
- Terminate at an add-a-fuse in the interior fuse panel, with a proper ground point and inline fuses as required.
Step-by-Step: Commercial Vehicle Wire Tidy Installation
This process works for most interior accessory wiring?dash cams, radios, light controllers, USB hubs, tablet docks, and more.
Step 1: Disconnect power and protect memory settings
- If you?re working on any power wiring, disconnect the negative battery terminal.
- If the vehicle has specialty fleet electronics, follow company procedures for shutdown.
- Give the vehicle a few minutes before removing trim near airbags.
Step 2: Identify your power sources (constant, ignition, and ground)
- Locate the interior fuse panel or upfitter/auxiliary switch wiring if your commercial vehicle has it.
- Use a multimeter to confirm which fuses are constant 12V and which are ignition-switched.
- Choose a solid chassis ground point (factory ground bolt is best). Avoid self-tapping screws into unknown metal.
Step 3: Map the route and test-fit panels
- Remove only the trim you need: lower dash panel, A-pillar trim, kick panel, or center console side panel.
- Dry-run your cable path and check for pinch points when panels are reinstalled.
- Mark clip or anchor locations with masking tape so you don?t guess later.
Step 4: Bundle and protect the wiring
- Group related wires together (power + signal + accessory leads) into one manageable bundle.
- Wrap the bundle with fabric harness tape in areas that contact trim to prevent buzzing.
- Add split loom in areas near metal brackets, under seats, or where abrasion is likely.
- Heat-shrink any splices, and add strain relief where a cable transitions into a device.
Step 5: Secure the bundle using proper anchors
- Use factory clips when available?often the best option for durability.
- Add screw-in mounts to metal support braces or thick plastic panels where safe.
- If using adhesive mounts:
- Clean the surface with isopropyl alcohol and let it dry.
- Press firmly for 30?60 seconds.
- Let the adhesive cure if possible before tugging on it.
- Zip-tie the loom loosely enough that you don?t crush wires, but tight enough that nothing slides.
Step 6: Handle pass-throughs and edge protection
- If a wire passes through a drilled hole or sharp-edged opening, install a rubber grommet.
- For plastic edges, use edge guard or split loom at minimum.
- Never route wires where trim clips will pierce or pinch them.
Step 7: Label everything (your future self will thank you)
- Add labels near the fuse tap and near each device connection.
- Use clear names like ?DashCam IGN? or ?Tracker CONST.?
- If you manage a fleet, include install date and circuit rating.
Step 8: Reassemble trim and test
- Reinstall trim panels carefully, watching that clips don?t snag wiring.
- Reconnect the battery and test each accessory:
- Ignition-switched items power on/off correctly
- No warning lights appear
- No rattles from the dash or pillar on a short test drive
- Do a final tug test on the harness: nothing should dangle or shift.
Common Mistakes to Avoid
- Routing through airbag deployment paths: This is the biggest safety issue. If you?re unsure, look up a trim removal guide for your exact model and identify airbag locations.
- Using electrical tape as a long-term solution: It unravels, gets sticky, and looks messy. Use fabric harness tape, loom, and heat shrink instead.
- Over-tightening zip ties: Crushing the loom can damage insulation and cause intermittent faults?especially in cold climates.
- Skipping grommets: A single sharp edge can cut through insulation over time, causing shorts or blown fuses.
- Bad grounds: Paint, rust, or loose bolts cause voltage drop and weird behavior. Use a known factory ground or bare metal with a star washer.
- No slack at service points: If you can?t pull a panel without yanking a connector, you?ll eventually break something.
Practical Tips for a Fleet-Grade Finish
- Match the cabin environment: Under-seat areas need abrasion-resistant loom; behind-dash areas benefit from anti-rattle fabric tape.
- Stagger splices: If you?re joining multiple wires, don?t stack splices in one bulky spot. Stagger them to keep the bundle slim.
- Use a dedicated accessory fuse block for multiple add-ons: If you?re powering more than two accessories, a small fuse block (with relay for ignition trigger) keeps things cleaner and safer than multiple add-a-fuse taps.
- Keep data cables separate when possible: For sensitive signal cables (some radio or camera lines), avoid running parallel to high-current power lines for long distances.
- Document the install: Take a few photos before trim goes back on. It makes troubleshooting and future upgrades much easier.
Quick Comparison: ?Basic Tidy? vs. ?Commercial-Grade Tidy?
- Basic tidy: a few zip ties, maybe electrical tape, minimal labeling. Works short-term but often rattles and becomes difficult to service.
- Commercial-grade tidy: fabric tape + split loom + secure anchors + grommets + labeled circuits. Cleaner look, fewer failures, easier fleet maintenance.
FAQ
How do I keep wires hidden without damaging interior trim?
Use plastic trim tools, follow factory harness routes, and avoid forcing panels back on. If a panel won?t sit flush, stop and check for a pinched wire or a bundle that?s too thick?then reroute or slim it down with better bundling.
Are adhesive zip tie mounts reliable in hot cabins?
They can be, but they?re sensitive to surface prep and heat. Clean with isopropyl alcohol, press firmly, and use quality mounts. For commercial vehicles that bake in the sun, screw-in mounts or factory clips are more dependable long-term.
What?s the best way to route wiring down the A-pillar for a dash cam?
Route the cable along the pillar edge in a way that stays clear of curtain airbag deployment. Many vehicles have a dedicated channel or space behind trim for wiring?if you see an airbag module or ?AIRBAG? marking, keep wiring away from it and never attach to airbag hardware.
Should I use split loom or fabric tape behind the dashboard?
Often both. Fabric tape is excellent where the harness touches plastic trim (it prevents squeaks). Split loom is better where abrasion is likely (metal braces, sharp edges, under-seat areas). A common approach is fabric tape for bundling, loom for protection at risk points.
Do I need to disconnect the battery for a wire tidy job?
If you?re only organizing existing low-voltage cables without touching power circuits, you may not need to. If you?re tapping fuses, adding grounds, splicing power, or working near airbag-related trim, disconnect the negative battery terminal to reduce risk.
How can I make future accessory upgrades easier?
Leave a small service loop, label circuits, and consider a dedicated accessory fuse block. Also, use hook-and-loop straps in access areas so you can open the bundle without cutting zip ties every time.
Next Steps: Make Your Cabin Safer and Easier to Live With
Start small if you need to: tidy one accessory at a time, replace electrical tape with fabric harness tape, and add loom where wires rub. If you?re planning multiple upgrades?dash cam, lighting controller, extra USB ports?do it once with a clean routing plan and a fused power strategy so the cabin stays organized for years.
When you?re ready, pick a wire tidy approach that matches how your commercial vehicle is used, then follow the step-by-step process: plan the route, protect the bundle, anchor it securely, label everything, and test for noise and function. Your interior will look more professional, and you?ll reduce the chance of annoying electrical gremlins down the road.
Explore more practical interior upgrade and maintenance guides on carinteriormix.com to keep your daily driver or work vehicle cleaner, safer, and more comfortable.